The Curves adjustment layer is a very flexible way to control the luminosity and colours of your image.
In the Curves panel you can control four different curves; the RGB curve controls the overall luminosity (brightness) of your image, and the Red, Green and Blue curves control the respective colour channels.
Which part of the curve you move determines which parts of the image are affected, the left part of the curve is the blacks/shadows, the middle of the curve is the midtones, the right part of the curve is the whites/highlights.
Moving the RGB curve up brightens the image, moving it down darkens it.
Moving one of the colour curves up increases the amount of that colour, moving the curve down decreases the amount of that colour.
The Red/Green/Blue colours have an inverse relationship to Cyan/Magenta/Yellow, so for example;
- reducing red is increasing cyan, increasing red is decreasing cyan
- reducing green is increasing magenta, increasing green is decreasing magenta
- reducing blue is increasing yellow, increasing blue is decreasing yellow
- reducing green is increasing magenta, increasing green is decreasing magenta
- reducing blue is increasing yellow, increasing blue is decreasing yellow
Clicking a point on the curve and dragging it is how you move the curve.
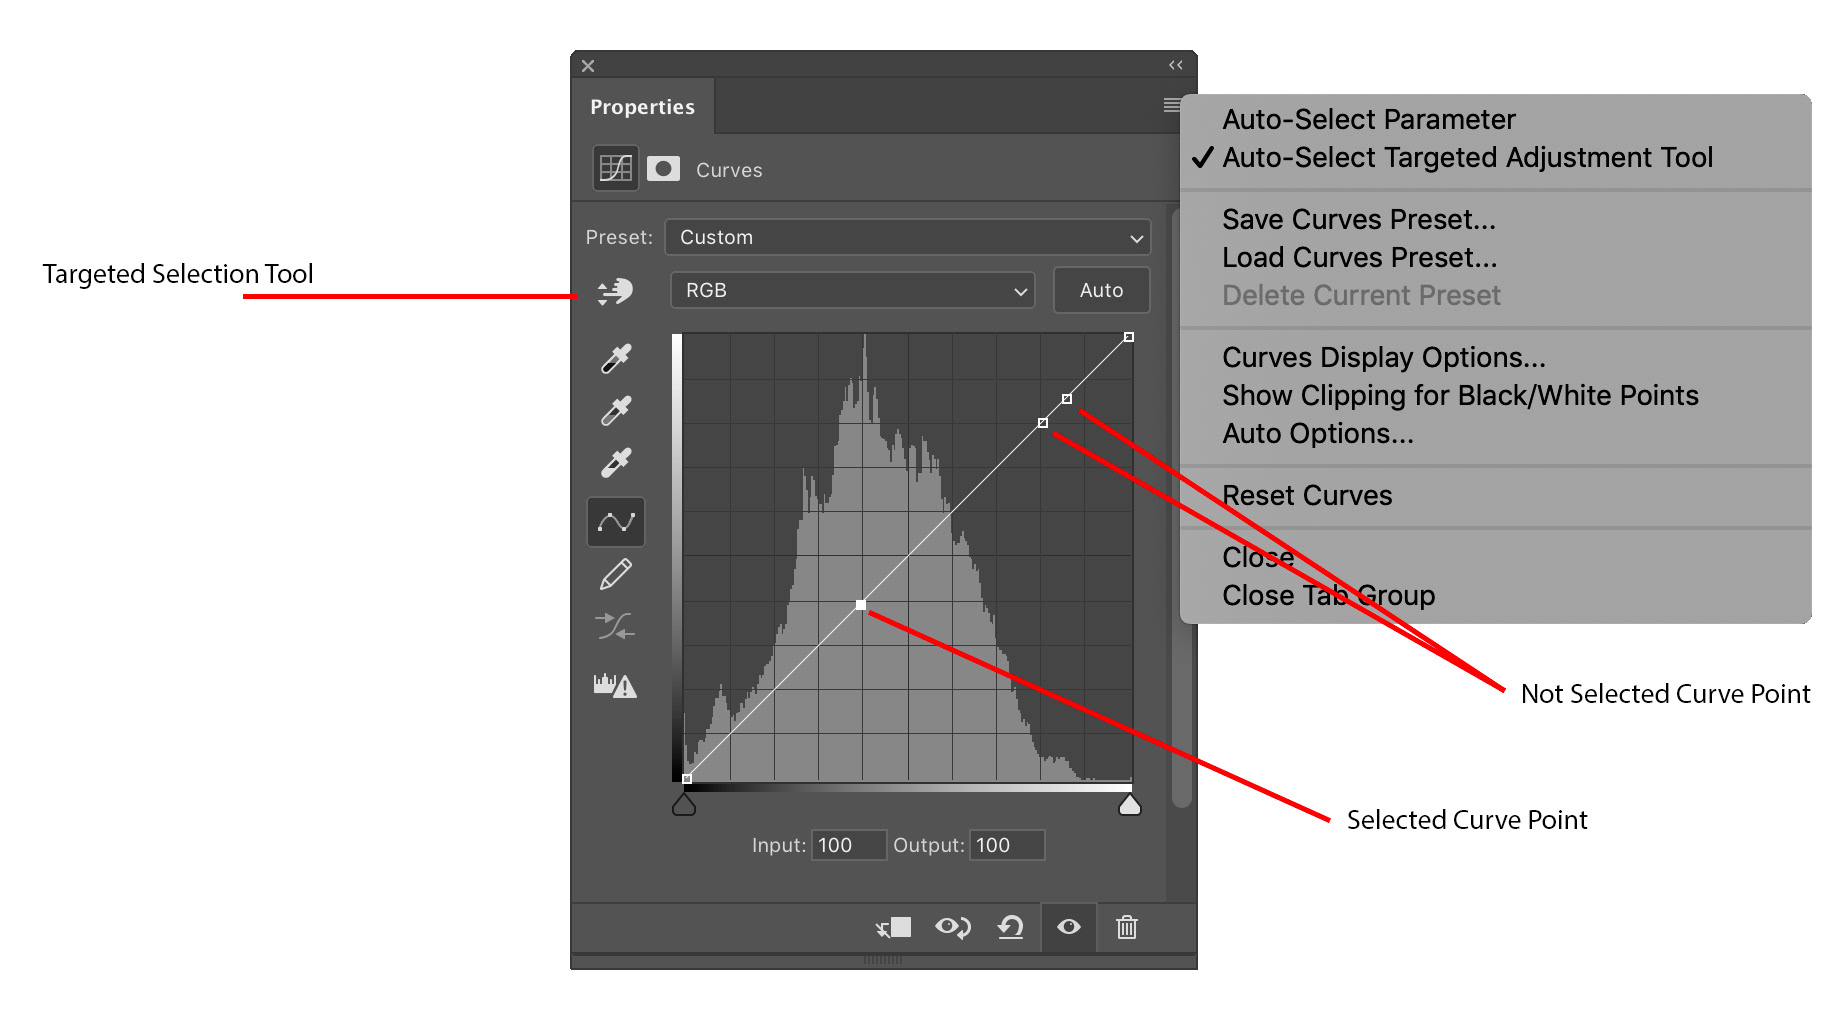
Fig 1 - Curves Property Panel
You can create multiple points on the curve to control which parts of the curve move, the last point created on the curve will generally be the “selected” point.
Selected points show as solid squares, not selected points show as outlined squares. When you click and drag a selected point the curve will move, while not selected points either side of the selected point will anchor the curve and keep the parts of the curve beyond them from moving.
You can [Shift]+Click points on the curve to select more than one of them, then moving any of them will move all the selected points.
As an alternative to dragging the points with the mouse, you can also use the up and down arrow keys to move the selected points of the curve. This is often preferable to using the mouse if you’re trying to make precise adjustments.
When you have a single point selected on a curve, you can use the + (Plus) and – (Minus) keys on the keyboard to cycle the selection to the next or previous points on the curve.
The Targeted Adjustment Tool in the Curves panel is very useful (see Figure 1). Click on this tool, and then click somewhere in your image and a point will be added to the RGB curve at the point representing the luminosity of the clicked point in the image. This allows you to target certain tones in the image much more accurately. Each time you click the image, another point will be added to the curve.
If you hold the [Cmd]+[Shift] (Mac) or [Ctrl]+[Shift] (PC) keys while clicking on your image with the Targeted Adjustment Tool, rather than a single point being added to the RGB curve, a point will be added to each of the Red, Green and Blue curves representing the colour of the selected point.
Another useful key modifier is holding down the [Shift] key while clicking on the image with the Targeted Adjustment Tool. Rather than adding a point to the curve, this will add a Colour Sampler point to the image, then you can view the RGB values for the selected point in the Info panel (see Figure 2). This can be very useful for accurate modifications (for example when trying to match colours, or when trying to establish neutral colours).
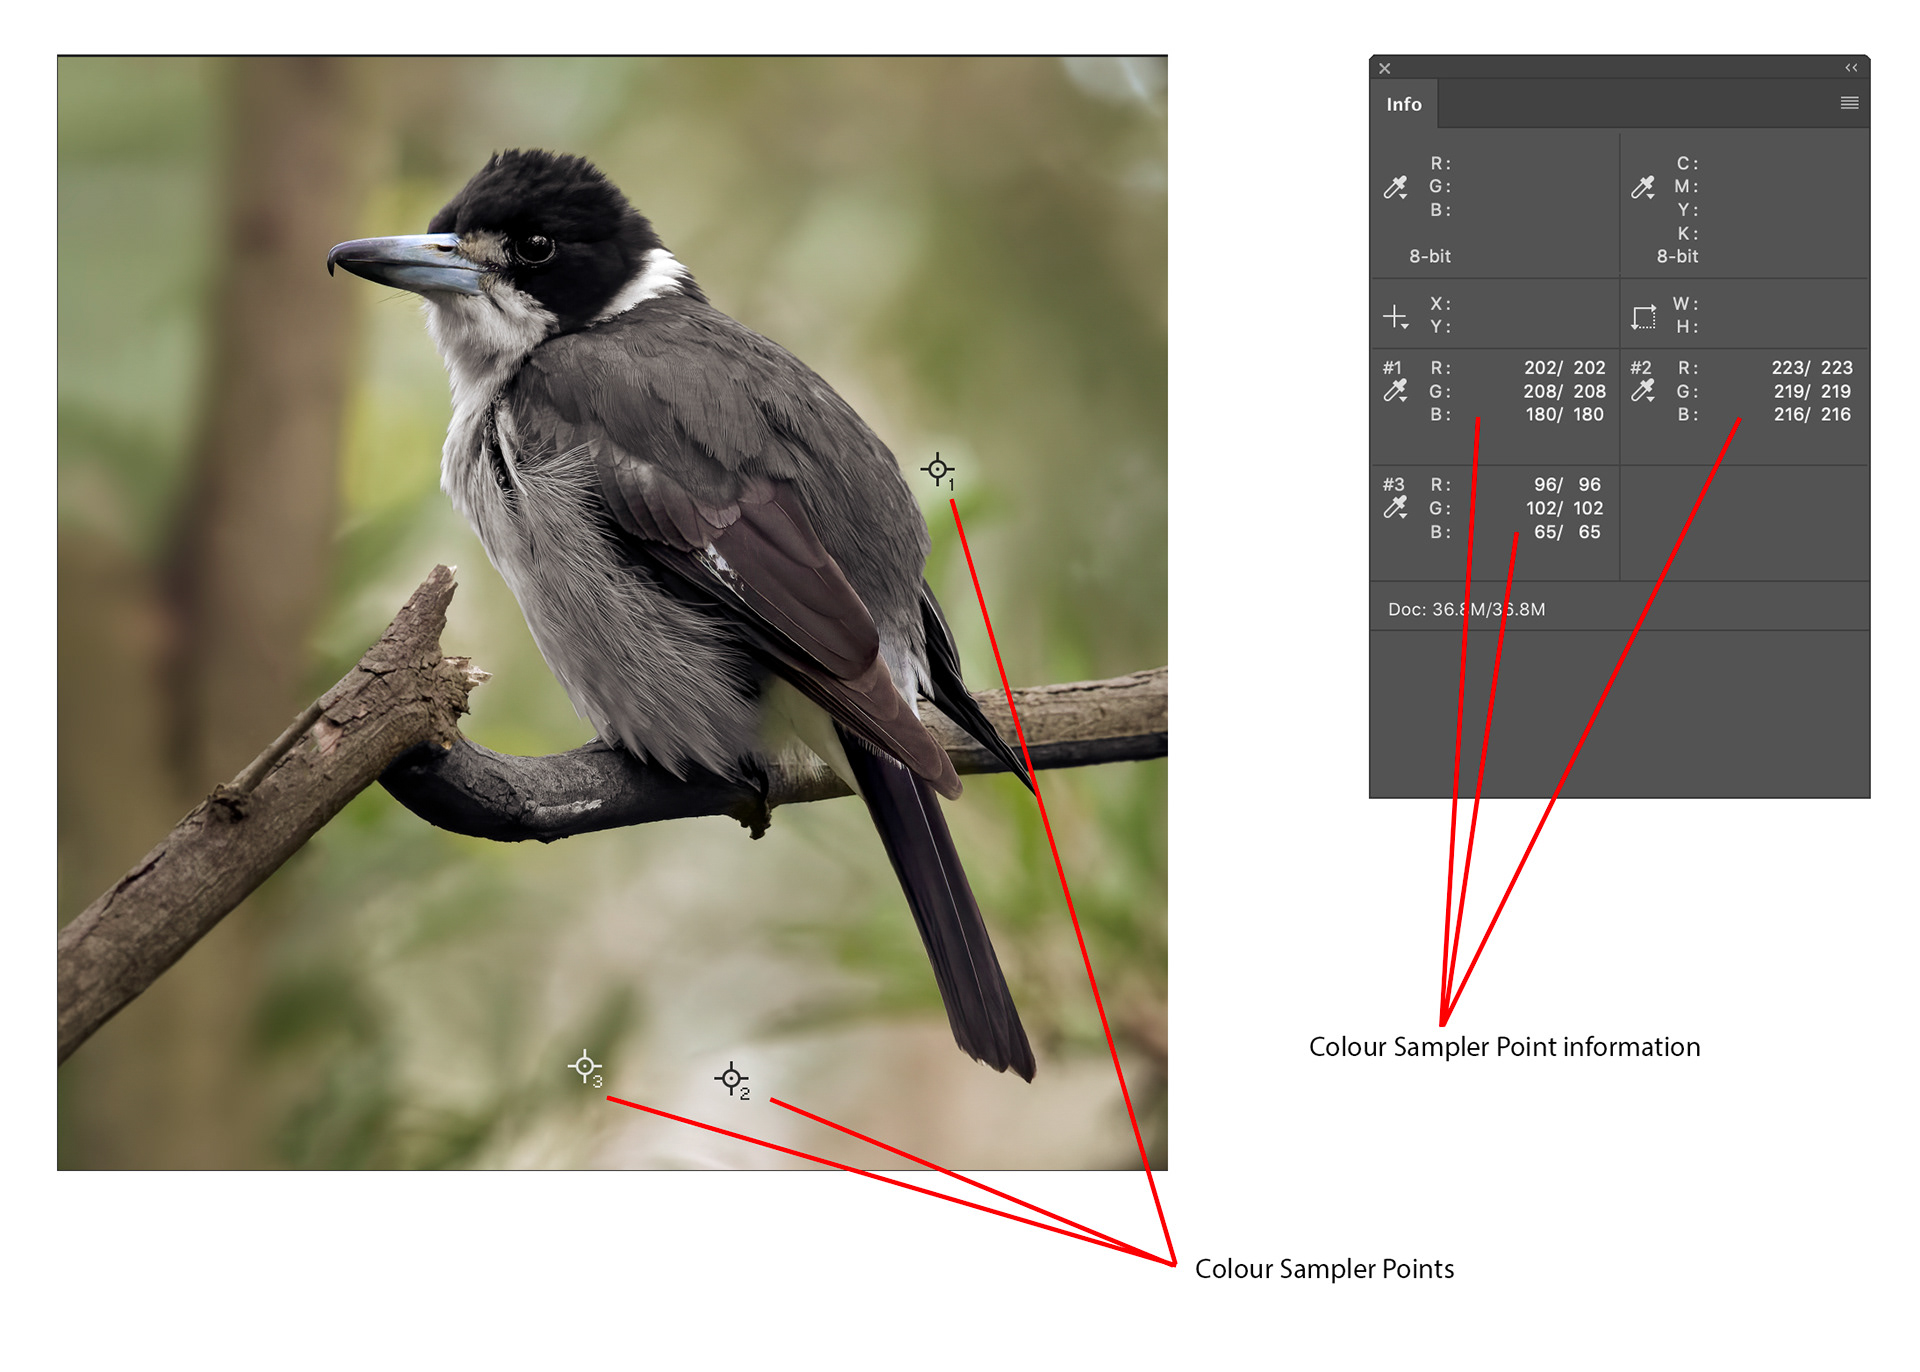
Fig 2 - Colour Sampler Points
If like me you nearly always use the Targeted Adjustment Tool when using a Curves layer you can select the Auto-Select Targeted Adjustment Tool in the Curves Settings menu and it will be automatically selected whenever you create a Curves adjustment layer.
This article was first published in the November 2019 issue of Artists Down Under magazine.